Posts Tagged ‘camp arts and crafts’

Not Your Mom and Dad’s Arts and Crafts

Sunday, April 20th, 2014

Summer camp arts and crafts programs often conjure images of beading lanyards and tie dying. Indeed, crafts are still a large part of camp, but art is becoming equally as important. That is to say that camps are investing more in open ended mediums that encourage campers to use their creativity to create works of their volition as opposed to pre-determined projects of summer camps past.

The difference between art and crafts may not be immediately clear to those who envision a room at summer camp that houses a seemingly unlimited supply of paintbrushes, glitter, paint, markers, glue, construction paper, and beads.  There is a marked difference, however. A recent article featured in Early Childhood News, M.A. and creative arts instructor Anna Reyer outlines the distinctions between art and crafts. Primarily art is open ended creations that evolve from a variety of supplies and minimal guidance. Crafts are pre-scripted projects assembled using specific supplies and guidelines with a finished product that is the same or similar for everyone.  There is something to be said for both the “arts” and the “crafts” of arts and crafts.

Crafts are fun, and many a camper sings the praises of the relaxation and satisfaction derived from a few minutes of down time in which they are given a set of materials and a set of instructions and are left to their own devices. It is an opportunity to be social and engage in casual conversation with other campers and counselors. There is also a sense of satisfaction with the end product, a three-dimensional completed object that the camper created from a group of raw materials.

Then there is art, the benefits of which are becoming increasingly obvious to camp owners and directors. Art projects provide campers with a period of time during the day in which very little, if anything, has been planned for them. It is their time to create as they choose. Whether it is painting or creating a piece of jewelry, it is a sanctioned part of the day that is limited only by their imaginations. Camp in general is a creative space. Through art, it is also an imaginative space. It’s a space in which children are free to unwind and mentally process their feelings. Art is the perfect opportunity for campers to recharge and turn around a day that has been less than perfect.  In that regard, similar things could be said about camp music, theater, and dance programs.

With the importance placed on creativity, fun, and happiness at summer camp, it is natural that summer camps invest big in arts and crafts programs. A memorable summer is more than just the glory of scoring a winning goal or swimming in the lake. Those times in which campers are left to their creative devices and are free to interact or not interact as they please provide crucial balance to the rest of the summer camp experience.

Swirl Some Color into Your Winter by Tie-Dying at Home

Tuesday, February 15th, 2011

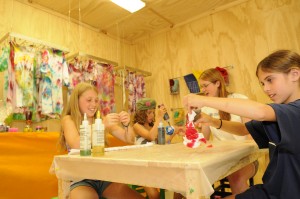
One of the most popular arts and crafts activities at Camp Starlight is tie-dying. There is no better way to liven-up a t-shirt, tank top, pillow case, or pair of socks than a fun tie- dying activity! Rain or shine Camp Starlight loves to tie- dye!  Even though it may seem better at Starlight… you don’t need to be in the Carriage House, surrounded by Leslie Schwartz and her talented team of Arts and Crafts Specialists to make something fantastic. You can follow these simple steps at home with your parents, siblings, grandparents, and friends to create something awesome to bring to camp in 2011!

#1.) Preparing the Shirt for Tying and Dying

•          First, the shirt must be 100% cotton or it will not hold the dye.

•          Always prewash the shirt.  It contains a fabric finish when it is new and this prevents all the dye from being absorbed into the fibers.  Washing will remove the finish.

•          Pre-soak the shirt in 1 cup of soda ash to 1 gallon of water. If you mix this with your hands, wear rubber gloves. Soak for 15 minutes to 1 hour.  The soda ash solution losses its effectiveness after 1 hour. You can no longer use it.  Dispose of the soda ash solution.

•          Squeeze out the soaked shirt. Wear rubber gloves when doing this. You are now ready to tie your shirt.

#2.) HOW TO TIE THE ITEM

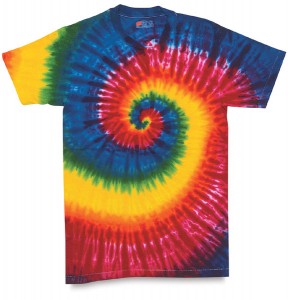
These are the directions for creating a swirl design. Make sure to place a large sheet of plastic down to protect the table.

•          Place the shirt out flat with the front side down. The side that is down always has the better appearance.

•          Place a clothes pin where you wish the center of the swirl to be.  Remember, that the center of the shirt may come down low on the person wearing it.  You may want to have the center of the swirl off center, near the top, or near the bottom.

•          Holding the clothes pin, swirl the shirt.  Gather up loose edges as you go.  The shirt should not go up in a point, but rather gather up only a few inches above the work surface.  When you are finished, it will be similar in size and shape to a round layer of cake.

•          Gently lift the twisted shirt and place a rubber band across the shirt, crossing the center point.  Add two more rubber bands, creating six “pie” sections.  These do not have to be equal in size.

•          Turn the shirt over and make sure that the rubber bands cross or X across the center of the swirl.

•          You are now ready to dye.

#3.) Dying the Tied Shirt

•          Cover the tables with plastic sheeting to prevent the dye from staining the surface.

•          If you are dying outside, you can work on the grass.

•          Place an entire newspaper under the tied t-shirt.  Have the newspaper in 2 large sections. The newspaper will absorb the dyes that overflow the shirt.

•          Remember the color scheme that you will be using.

•          Put on the rubber gloves.

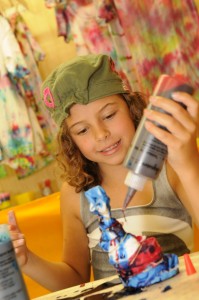
•          Using the squirt bottles containing the mixed dye, start with your first color. Carefully tip the bottle over and point it at the triangular “pie section” of the tied shirt.  Start near the edge and squeeze the dye out gently.  Move toward the center as you dye that section.

•          Change colors as you go around the shirt.  For three colors you will repeat the colors twice on each side.

•           When you turn over the shirt, flip the newspaper to a clean section.

•          You will be able to see the colors used on the sections of the dyed side.  Repeat the same colors on the second side.

•          When the shirt is dyed on both sides, place the shirt inside a plastic bag.  Twist tie this closed. You will leave the shirt inside the bag for 24

#4.) Washing and Drying the Tie-Dyed Shirt

•          Again, leave the dyed shirt inside a sealed plastic bag for at least 24 hours.

•          There are two ways to rinse and wash a dyed shirt (multiple or single shirts).

•          The first way is to rinse the shirt out in a sink or with a hose until most of the dye is gone and the water runs clear. Remove the rubber bands and continue to rinse, if necessary.

•          Place rinsed shirt in a washer and wash with detergent.  ((Warm water is okay.)

•          You may place the shirt in the dryer or line dry, if you choose.

•          The 2nd way works well with a single dyed shirt. You may skip the rinsing and instead place the shirt in the washer and wash it alone in a complete load of water.  No pre-rinsing is necessary. Dry.

•          Now wear your shirt!

Just in case you need a few helpful tips… here are Leslie Schwartz’s Top Tips for creating an awesome masterpiece.

  1. Mix the soda ash and dye solutions ahead of time. Store mixed dyes in the refrigerator so they don’t lose strength.
  2. Make sure the rubber bands are on super tight; the tighter they are the better the shirt will come out.
  3. Make sure to wear rubber gloves.
  4. Pick colors that will look good together – like turquoise, navy blue, crimson, etc. If you want high contrast like yellow and purple, be sure to do the colors at separate times so the purple and yellow cannot mix! Maybe you can do the first (lighter) color one day and the second color the following morning.
  5. Rinse project after dyeing with warm water, followed by a cool water rinse.
  6. Have Fun!
  7. Have Fun!
  8. Have Fun!